Blog Archives
Re-Invent Your Laundry Basket
Do you have an old laundry basket that you want to re-design?
Or maybe you just want a new laundry hamper but don’t have enough money to buy a new one…
Well have no fear because I have the solution for you!
Next semester I will be moving into my sorority house and the hamper I used in my dorm room has ripped. However, I remembered that I have an old scratched up black hamper that I left home to collect dust. This hamper is now what I will use for my future dirty clothes and it isn’t pretty looking at all, so I decided to bedazzled it!
So if you want to learn how to re-invent your laundry basket like mine, keep on reading because I have the step by step instructions to help you.
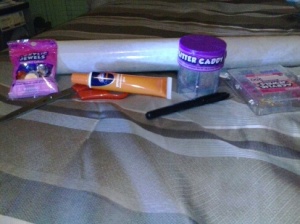
Materials Needed:
Laundry Basket/ Hamper (Not Pictured)
Clorox or Lysol Wipes/ Or Damp Paper Towels with a little bit of Soap (Not Pictured)
Glue (I got mine at Wal-Mart on sale for $3.00/ Elmer’s Precision Embellishment Glue)
Jewel Stones in the colors of your choice (I got mine at Wal-Mart for Approx. $5.00 – 200 stones with Adhesive in the back)
Optional Materials:
Shelf Liner with Adhesive in the back ($1.00 at the Dollar Tree)
Marker
Chalk
Glitter of the color of your choice
Scissors
Step 1:
In order for the jewels to stick better you need to clean the surface of your hamper. So grab your Clorox/ Lysol wipes or a damp paper towel with soap and scrub your hamper down.
Step 2:
After you cleaned your hamper, grab your jewels and start placing them onto the hamper.
Tip:
Even though you may have got the jewels with the sticky adhesive in the back, you still might want to glue them onto the hamper. I didn’t do this the first time around and I ended up having to glue the jewels back on again because they kept on falling off. So please learn from my mistakes, glue them the first time around because it will save you a lot of time.
This is how your Hamper should look after you bedazzled your whole Basket:
Step 3 (Optional):
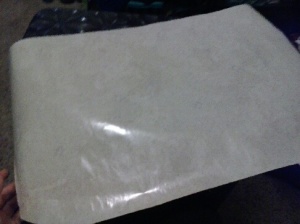
If you have a top on your hamper, grab your shelf liner and measure your liner to the cover of your basket.
Keep in mind you don’t have to do this even if you have a cover to your hamper. I only did it because the cover of my old hamper had writing on it.
Step 4 (Optional):
After you measured your shelf liner to the cover, begin to take off the back paper that covers your adhesive. Once you have done that, begin to press the adhesive side of the liner against the top of your hamper cover. After you have done that, grab your scissors and cut off any excess liner so that it wraps around the cover perfectly.
This is how it should look so far:
Step 5 (optional):
Once you have the shelf liner in place, grab your chalk and try the different styles and wording you would like to put on your hamper cover.
After you decided on a design grab your marker and outline your wording with a marker.
Next grab your glue and outline the wording with glue.
Remember to have your glitter nearby because you will need it as soon as you finish outlining your word(s) with glue.
Step 6 (optional):
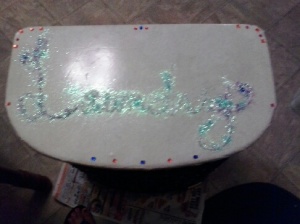
Quickly grab your glitter and spread it all over the glue so that it has a thin layer of glitter on top of your word(s).
Before brushing off the excess glitter let the glitter sit on top of the glue for at least 2 hours or until dry.
Step 7 (Optional):
Once your glue has dried, carefully brush off any excess glitter from your wording, so that all that is left is the glitter stuck onto the glue.
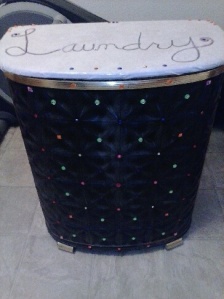
This is how your finished basket should look:
!!!Enjoy!!!


