Blog Archives
Tye Dye with Bleach

Want a Tye Dye Shirt but don’t have enough money to buy the kit?
Have an old shirt you want to make look like new again?
Or maybe you got bleach on one of your favorite shirts and you aren’t quite ready to let go yet…
Whatever your reason to tye dye with bleach, look no further for instructions on how to do it because I will show you.
JUST KEEP ON READING…
Details:
Time Spent: Approx. 30 min.
Difficulty: Easy
Budget friendly: Yes
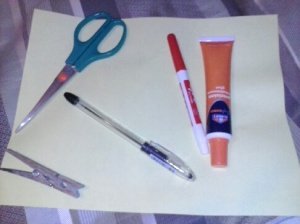
Materials Needed:
Bleach (Any Brand)
Vinegar
Popsicle stick
About 10 rubber bands
Gloves
2 plastic containers
Water
Shirt (Not Shown Above)
Step 1:
Get your shirt and lay it flat. As you can tell I am tye dying my shirt because I accidentally got bleach on it while cleaning.
Step 2:
Pinch the middle of your shirt with your fingers.
Step 3:
Once you pinch your shirt begin to turn your shirt in either a counter-clockwise or clockwise direction. (If you want to do another tye dye design, now would be the time to do it.)
Step 4:
Once you twisted your shirt till you can’t no more, begin to tuck in the extra material of your shirt towards the center (like shown above). You want your shirt to be in the shape of a circle unless you are doing another type of tye dye technique.
Step 5:
Now that your shirt is in the shape of your of a circle, take one of your rubber bands and place it around the shirt in order for your shirt can stay in a circle.
This is how your shirt should look now once you’ve placed the rubber band.
Step 6:
Once the first rubber band is in place continue to place the other rubber bands in different directions around the shirt to make it into a “kinda perfect” circle. Also if some of your bands break don’t worry.
Step 7:
Now that your rubber bands are on your shirt, take one of your containers and fill it with room temperature water about halfway. Now take your bleach and put in about 1 cup of the bleach into the container with the water. Next take your popsicle stick and stir the liquids together. Now you are able to stick your shirt into the container with the bleach. (As you can see in the picture above, I used one of my broken rubber bands to hold my shirt so I didn’t have to touch the solution with my hands too much since I didn’t have gloves on hand.)
Leave your shirt in the bleach for about 7 min. Even if you don’t see the shirt change colors on the outside, it is most likely bleached on the inside already.
Step 8:
Once the 7 minutes has passed, take your shirt and take it to the sink and rinse the bleach off the shirt as much as you can without removing the rubber bands.
Step 9:
Next grab your second container and fill it half ways with room temperature water and the rest with your vinegar and then stir the 2 liquids together. After you have done that, place your shirt in the container with the vinegar solution. Leave the shirt in for about 12 minutes. (I personally left mine in for about 20 minutes because I didn’t have that much vinegar).
So why vinegar you may ask?
Well vinegar helps neutralize the bleach.
Step 10:
After the 12 minutes have passed, take your shirt and place it under the faucet in your sink. Rinse your shirt of the vinegar without removing the rubber bands. After you have rinsed the shirt, begin to take off the rubber bands off your shirt so you can finish rinsing the shirt thoroughly. After rinsing your shirt with water, begin to ring it out and hang it up to dry.
This is how your finished product should look:

